
How to Make Perfect Chocolate Chip Cookies Every Time
The scent of warm, golden treats is like a trip back to childhood. It reminds us of happy times in the kitchen with family. Now, you can make those best chocolate chip cookies yourself, whenever you want.
Getting the perfect cookie is a science. With a few key techniques, your cookies can be as good as those from a bakery. This guide will show you how to make your homemade cookies perfect every time.
Table of Contents
Essential Ingredients and Equipment
Every great batch of cookies starts with the right ingredients. Knowing the chemistry of your pantry staples is key. It’s the first step to baking the best chocolate chip cookies every time.
Selecting High-Quality Ingredients
The taste of your homemade chocolate chip cookies depends on the ingredients. Choose high-fat European-style butter and pure vanilla extract. These choices make your cookies stand out.
The Role of Butter Temperature
Butter temperature is crucial. Make sure it’s at about 67°F. If it’s too warm, your dough will spread too much during baking.
Choosing the Right Flour and Leavening Agents
Getting the flour right is key for classic chocolate chip cookies. Use a digital scale to avoid packing too much flour. Fresh baking soda is also important for the perfect rise.
Must-Have Kitchen Tools
The right tools make baking easier. A stainless steel spring-loaded scoop helps make uniform cookies. This ensures they bake evenly, giving you the best chocolate chip cookies.
A heavy-gauge baking sheet also helps with heat distribution. With these tools and a classic chocolate chip cookies recipe, you’re set for success in your kitchen.
Preparing the Dough for Success
Your journey to the best chocolate chip cookies starts with making the dough. This step lays the groundwork for a treat that stays great for days. By following a precise process, you ensure every batch meets professional standards.
Creaming Butter and Sugars
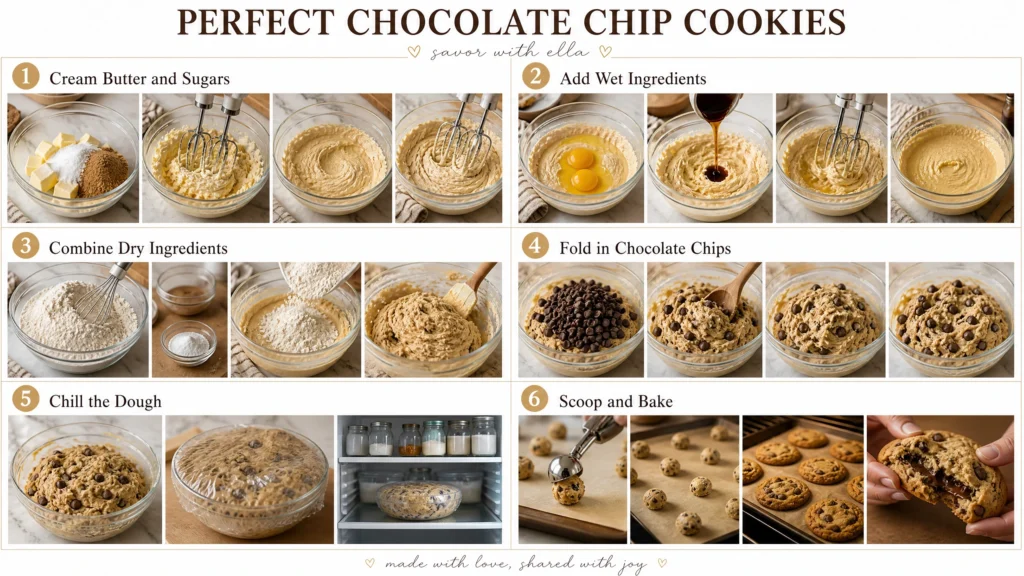
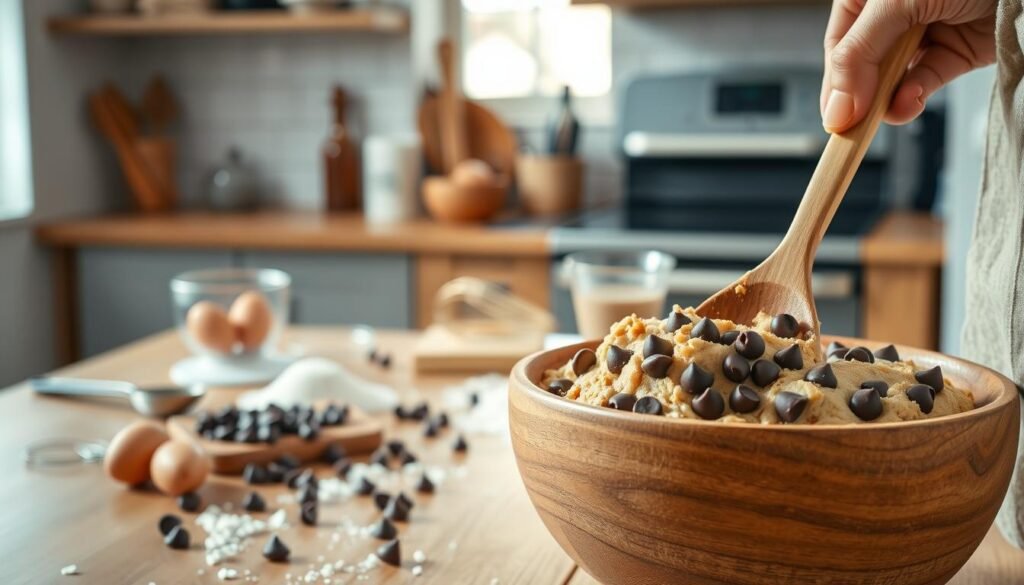
The secret to soft chocolate chip cookies is in the creaming. Beat your butter and sugars until it’s light, pale, and fluffy. This step adds air bubbles, helping the cookies rise and get a better structure.
Incorporating Dry Ingredients
After aerating your butter mixture, add dry ingredients slowly. Mix just until the flour streaks disappear to avoid tough cookies. An easy chocolate chip cookie recipe needs this gentle touch for tenderness.
The Importance of Chilling Your Dough
Chilling your dough for at least 24 hours is highly recommended. This allows flour to hydrate and fats to solidify. Chilling your dough improves the quality of your chewy chocolate chip cookies.
Why Resting Time Improves Flavor
Resting breaks down proteins and starches into simpler sugars. This enhances the flavor, making your cookies taste richer. You’ll notice a big difference in taste compared to dough baked right away.
Achieving the Perfect Texture
Chilling prevents cookies from spreading too much in the oven. Cold butter ensures edges set while the center stays soft. This is how you get those chewy chocolate chip cookies everyone loves.
| Resting Time | Flavor Depth | Texture Result |
|---|---|---|
| 0 Hours | Basic/Sweet | Thin and crispy |
| 12 Hours | Balanced | Soft and chewy |
| 24+ Hours | Complex/Rich | Perfectly dense |
Mastering the Baking Process for Chocolate Chip Cookies
Once your dough is ready, the oven phase is key. Getting consistent results needs careful timing and watching your dough. This way, every batch of Chocolate Chip Cookies turns out just right.

Setting the Correct Oven Temperature
Most recipes do best at 350°F to 375°F. This temperature helps the edges set while keeping the middle soft. Make sure your oven is fully preheated for even heat.
Proper Spacing on the Baking Sheet
Leave enough space for your dough to spread without merging. Aim for two inches between each cookie. This space is crucial for chewy chocolate chip cookies that bake evenly.
Determining When Cookies Are Done
Knowing when to take the cookies out is key. Look for visual signs rather than just the timer. You want the structure to be set but still moist inside.
Identifying Golden Edges and Soft Centers
Take your cookies out when the edges are golden but the centers are still a bit soft. The carry-over heat from the baking sheet will finish them off. This trick makes gooey chocolate chip cookies that are irresistible.
Cooling Techniques for Optimal Results
To get that perfect look, use a round cookie cutter to swirl the edges right after baking. This makes the cookies round, thick, and delicious. Let them cool on the pan for five minutes before moving them to a wire rack.
| Cookie Texture | Baking Temp | Baking Time |
|---|---|---|
| Soft and Gooey | 350°F | 9-10 Minutes |
| Chewy and Thick | 365°F | 11-12 Minutes |
| Crispy Edges | 375°F | 13-14 Minutes |
Troubleshooting Common Baking Issues
Mastering baking means knowing how to fix common mistakes. Even with perfect recipes, small errors can affect your results. By making simple adjustments, you can make sure your Chocolate Chip Cookies are perfect every time.
Fixing Flat or Spreading Cookies
Too spread-out cookies often come from butter that’s too warm. It should be at cool room temperature. This helps it keep its shape during baking.
Also, make sure your baking sheet is cool before adding dough. If baking in batches, let the sheet cool completely between each batch. This keeps your soft chocolate chip cookies in shape.
Preventing Dry or Hard Cookies
It’s a bummer when cookies get hard after a day or two. Store them in an airtight container with a slice of white bread. The bread keeps them gooey chocolate chip cookies for longer.
Don’t overbake your dough. Take the cookies out when the edges are set but the centers are still a bit soft. They’ll finish cooking on the hot pan as they cool.
Adjusting for High-Altitude Baking
Baking at high elevations needs special care. The air pressure is lower, causing dough to rise too fast. You might need to raise your oven temperature or use less baking soda. These changes stop your Chocolate Chip Cookies from falling after rising.
Also, add an extra tablespoon of flour to your dough. This is crucial above 3,000 feet. It keeps your soft chocolate chip cookies from falling apart. By trying these changes, you can bake great cookies anywhere.
Conclusion
Baking is a mix of science and creativity. Now, you can make bakery-quality Chocolate Chip Cookies at home.
This simple recipe is a great start for your cooking journey. Try different Ghirardelli chocolates or add sea salt for extra taste.
Every batch you make will make you more confident. Keep improving and share your cookies with loved ones.
Your kitchen is a place for tasty experiments. Use this recipe to make memories, one batch at a time.